Here is the 3rd article in our series dedicated to mountain orientation.
After discovering the different tools, which are the map, the compass, and the altimeter, we will now learn how to use them with basic techniques allowing orientation with good visibility.
In the next article, we will discover some “advanced” techniques (intentional error, tangent to the curve) to use with reduced visibility, but very delicate to implement.
Basic techniques:
Now that you know the three essential tools for orientation (map, compass, altimeter), we will learn some basic techniques.
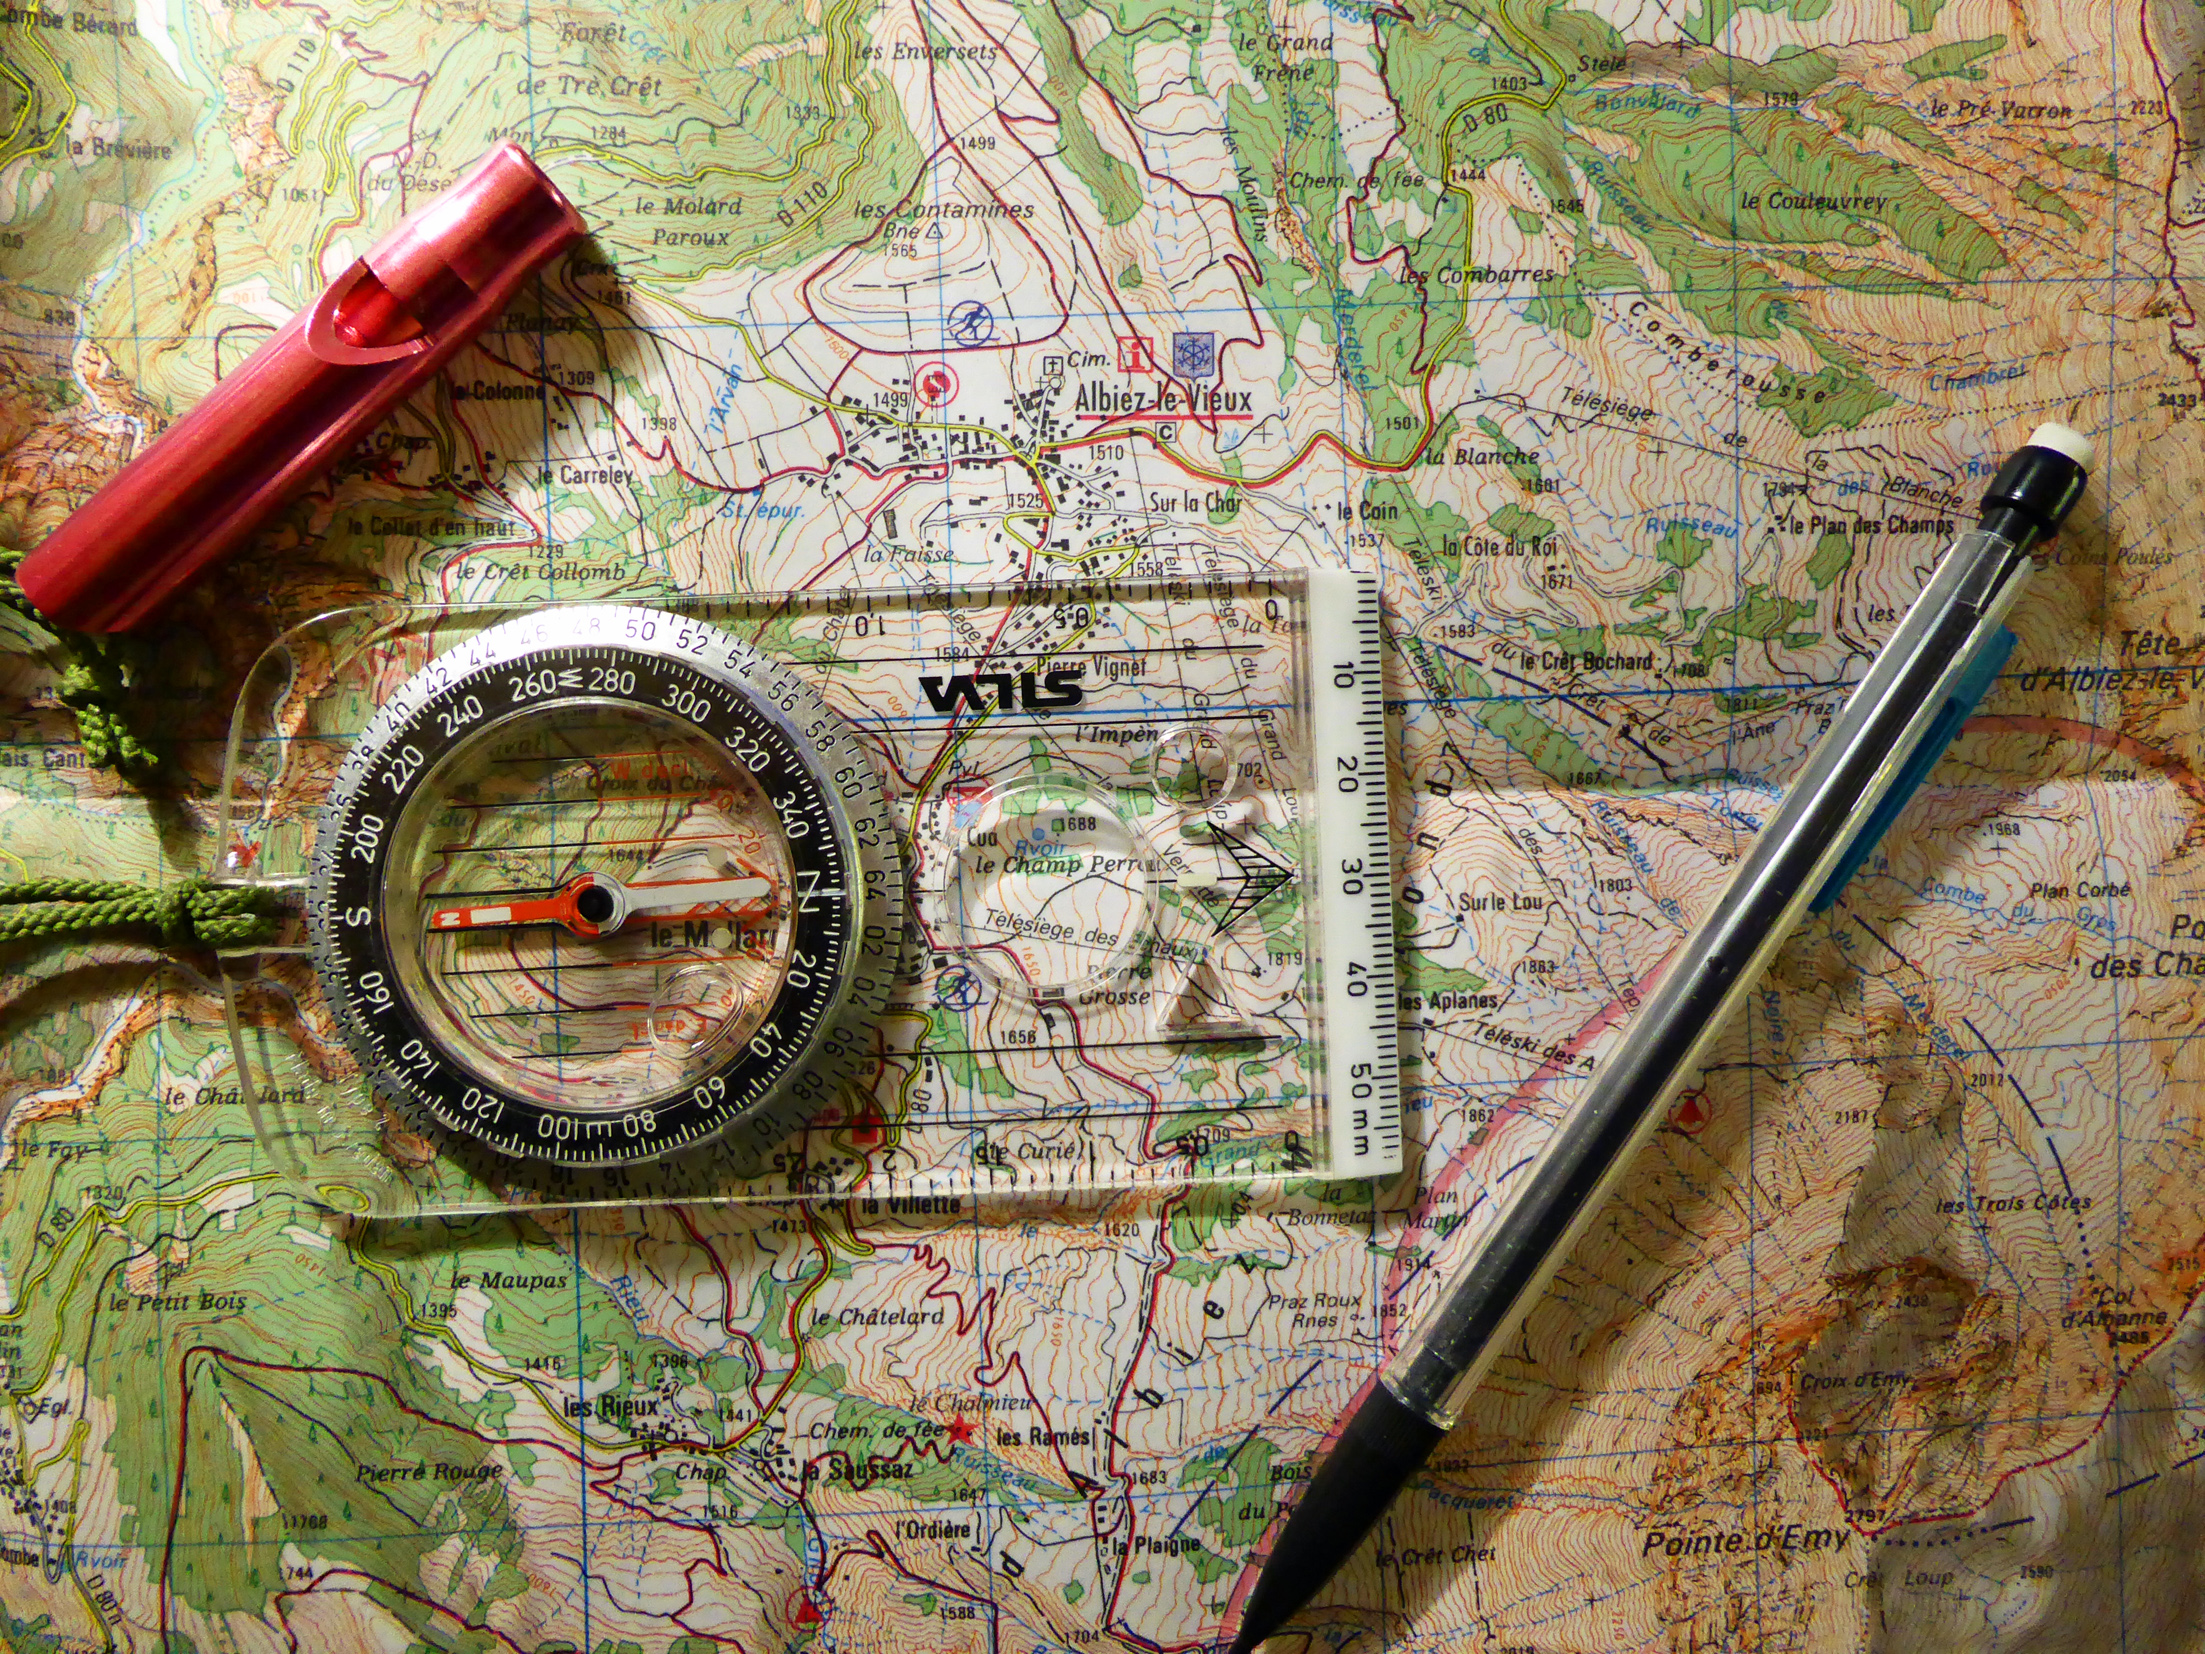
Taking the bearing on the map of the direction to follow:
The angle between the direction to follow and north is called the azimuth.
For example, azimuth 270° is west.
To take this azimuth on a map:
- On the map, orient the sighting marker (plate) in the direction to follow. Now do not move the plate anymore.
- Align the north on the rotating dial with the north (top) of the map. On some maps (on the TOP25 IGN for example), vertical lines will help you.
- Read the azimuth directly on the compass (angle of the walking direction)
Note that in the same way, you can take the azimuth of a characteristic point on the terrain.
Following an azimuth on the terrain?
To follow the azimuth you took on the map on the terrain, once this angle is displayed on the plate, simply turn around yourself to align the north of the rotating dial with the red needle of the compass (magnetic north).
The walking direction is then given by the sighting marker on the plate. For more accuracy when aiming, hold your compass at arm’s length and at eye level.
Determining your position on the terrain
Provided the visibility is good, the compass and map are enough to determine your position. You will still find it easier with an altimeter as a complement.
Compass + map:
- From the point where you are, aim with your compass at a characteristic point in the surrounding landscape (a known summit, for example).
- Take the azimuth of this point (same method as taking an azimuth on a map).
- Report this azimuth on the map starting from the characteristic point you aimed at and subtracting 180° (if you took the azimuth of the characteristic point as 270°, on the map, from this known point, you will report 90°).
- From this point, draw a line following the azimuth taken.
- Your current position lies on this line thus drawn, but this is not sufficient. To know your precise position, you need at least 2 points.
- Repeat the previous operations with another characteristic point.
- The two lines thus drawn will cross at a place, that is your position. For more accuracy, continue with a third point.
Compass + map + altimeter:
- The advantage of the altimeter is that you already have one known point, your altitude.
- When you have drawn your first azimuth line (1st characteristic point), this line will cut the contour lines and in particular, the one corresponding to your altitude.
- This point of intersection corresponds to your position. But, depending on the terrain configuration, it may happen that this line crosses your contour line at several points. In this case, either a precise reading of the map will allow you to determine on which intersection you are, or you will have to take the azimuth of a second point in order to refine your position.
In the next article, we will discover some “advanced” techniques allowing orientation with reduced visibility. But before approaching these methods (tangent to the curve, intentional error…), it is imperative to master the basic techniques, that is to say, to know how to take an azimuth on the map and follow it, and to know how to determine your position.